Overview
Once you have added all the necessary information about your restaurant, the next step is to make it visible on the guest app front page. This ensures that guests can find the restaurant, view its details, and make a reservation.
This article explains how to display your restaurant on the app front page so that guests can easily access it.
Before getting started
Before making your restaurant visible on the app front page, make sure you:
- Have completed the restaurant setup under Content > Facilities > Restaurants in the CMS.
- Have configured the restaurant's booking system.
- Have access to My app > (Select your app) > Customize your app > Edit my app.
Important:
If you already have a section on the app front page that links to all restaurants, you don’t need to take any additional steps for each new restaurant you create. The new restaurant will be automatically included.
You would only need to add it separately if you want to highlight it in a banner or another specific widget.
Step-by-step guide
Step 1: Access app customization settings
- Navigate to My app in the CMS.
- Select the correct app if managing multiple properties.
- Click Customize app and then Edit my app.
Step 2: Make the restaurant visible in the app
You can add your restaurant to the guest app in one or both of the following ways:
Option 1: Add a link to the restaurant in the side menu
-
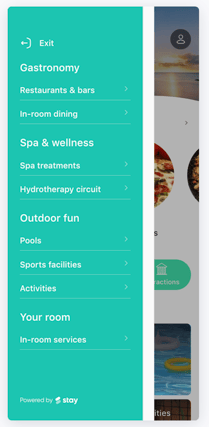
In Edit my app, go to the Side menu section.
The side menu shows shortcuts to all sections of your app organizing the contents by categories that you can define.
-
Activate Show side menu to enable the menu in the app.
-
Customize the logo, background color and text color.
-
Click Add group to create a category (e.g., Restaurants).
-
Click Add section to link a specific restaurant, a list of restaurants, or a content group. Choose:
- Content source (Hotel, Corporate or URL).
- Content item (the restaurant or list).
- Title to display in the menu.
-
Click Save changes.
The side menu will now display a direct link to your restaurant.
Option 2: Add a widget to the front page
Widgets let you highlight key content on the app front page. Below are the most useful widgets for restaurants:
Types of widgets and how to configure them
- Dynamic content widget: Displays rotating content (menus, offers, booking options).
- Go to Edit my app > Add widget (+ icon).
- Select Content.
- Choose Services as the Content type.
- Customize design: title, action text, and cards orientation.
- Choose the image style: if showing a subtitle and what type.
- Set widget visibility.
- Click Save changes.

- Grid widget: Displays multiple items in a structured layout.
- Go to Edit my app > Add widget (+icon).
- Select Grid.
- Choose if you want a title or action text.
- Set widget visibility.
- Click Save changes.

- Shortcut widget: Shows up to 3 buttons with icon and text that link to any section in the app.
- Go to Edit my app > Add widget (+ icon).
- Select Shortcuts.
- Click Add and select the restaurant or list to link.
- Add an image, title, and background color.
- Set widget visibility.
- Click Save changes.

- Highlights widget: Shows highlighted content in an horizontal slider with image, title, subtitle, and a call-to-action button.
- Go to Edit my app > Add widget (+ icon).
- Select Highlights.
- Select the Content to link.
- Add an image.
- Customize design: title, subtitle, button text, and button color.
- Set widget visibility.
- Click Save changes.

- Banner widget: Shows a banner-style card with image or video, title, subtitle, and call to action link.
- Go to Edit my app > Add widget (+ icon).
- Select Banner.
- Select the Content to link.
- Customize design: banner type, image, title and button text and color.
- Set widget visibility.
- Click Save changes.

Once added, these widgets will appear on the front page for easy guest access.
Extra tips for organizing your restaurant content
Use categories to group restaurants
Categories (accessible via CMS > Facilities > Restaurants) help you group restaurants by type (e.g., buffet, à la carte), location, or any other criteria relevant to your property. You can link these categories from widgets or the side menu to improve navigation and make it easier for guests to find what they’re looking for.
Combine services using content groups
Content groups (accessible via CMS > Other > Content groups) let you display multiple services in one section (e.g., restaurants, room service, bars). Instead of listing each service separately, you can organize them under one unified category to enhance the guest experience.
Create custom views with landing pages
Landing pages (accessible via CMS > Other > Landing pages) allow you to bring together multiple services—such as restaurants, bars, or room service—on a single, fully customizable page. You can personalize the layout, design, and structure to better reflect your brand.
Once created, a landing page can be linked directly from the app front page or the side menu, offering guests a more engaging and unified browsing experience.
Next steps
After making the restaurant visible and accessible in the app, consider the following:
- Monitoring bookings from the CMS to track demand.
- Adjusting widgets or content groups based on guest feedback.
- Using Insights to analyze guest behavior. Go to Insights > Analytics > Behaviour > Frontpage usage to view data on how guests interact with your app front page. You’ll find metrics such as total sessions, number of clicks per element, and the percentage of users who clicked on each section.
Need further assistance?
If you have additional questions or require further assistance:
- Contact us via live chat
- Send a ticket to our Support team
- Visit STAY Academy, our training platform.