Overview
The Concierge chat feature provides a direct communication channel between guests and your staff, allowing you to address questions about your restaurant quickly and efficiently. Guests can access the chat via a button in the app, submit their queries, and receive responses directly on their devices.
This feature lets you customize chat texts, set availability schedules, and include a brief description of the average response time to manage expectations effectively.
Before getting started
Before setting up Concierge chat for your restaurant, ensure you:
- Have activated Concierge chat for your property.
- Know the schedule and staff emails that will handle guest inquiries.
- Plan short, clear texts for the button and chat interface.
Step-by-step guide
Step 1: Access the restaurant’s settings
- Navigate to Content > Facilities > Restaurants in the CMS.
- Hover over the restaurant box and click Edit.
Step 2: Enable Concierge chat
- Go to the Concierge chat tab.
- Toggle the Activate Concierge chat switch to activate the feature.
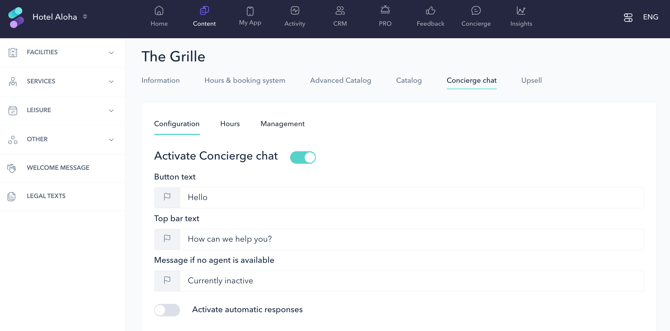
Step 3: Customize chat texts
- In the Button text field, enter the text guests will see on the button (e.g., "Ask us").
- Click the flag icon to add translations for all supported languages.
- Ensure the text is no longer than 10 characters.
- In the Top bar text field, enter the message guests will see after clicking the button (e.g., "How can we help you?").
- Use the Message if no agent is available field to customize the text displayed when no staff members are online.
- Activate the Automatic responses button if needed. Configure:
- The delay time between the last guest message and the automatic response.
- The Message to inform it is an agent who responds, not the bot (when out of service hours) field to reassure guests that their query will be addressed by a staff member.
- Make sure you have added tags when creating the service (Restaurants > Edit > Information > Tags).
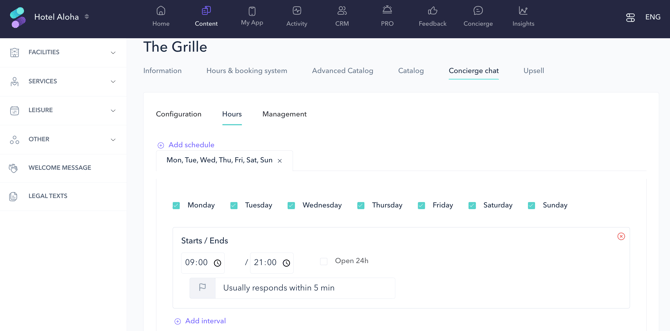
Step 4: Set the chat schedule
- Go to the Hours tab.
- Click Add schedule and select the days of the week for the schedule.
- Enter the available time slot in a 24-hour format.
- To add additional time slots, click Add interval.
- Repeat these steps to create separate schedules for different days.
- For each schedule, add a brief description of the service (e.g., "Average response time: 15 minutes").
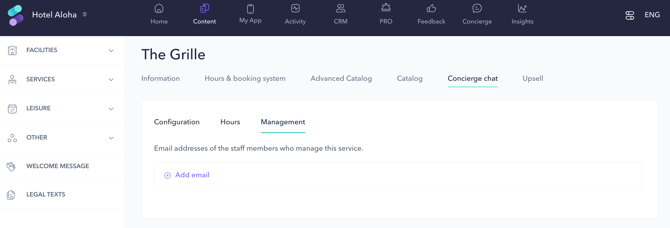
Step 5: Add staff email addresses
- Go to the Management tab.
- Click Add email to enter the email addresses of the staff who will manage guest inquiries.
- Add each address individually. These staff members will receive chat notifications via email and can reply through the email or the CMS Concierge chat section.
Step 6: Save changes
- Once all configurations are complete, click Save changes.
Next steps
After configuring Concierge chat, test the setup to ensure it works as expected. Train your staff to handle guest inquiries efficiently through the provided tools.
Need further assistance?
If you have additional questions or require further assistance, you can:
- Contact us through live chat.
- Send a ticket to our Support team.
- Visit STAY Academy, our training platform.